After Steps 1 and 2 are complete:
1- UPLOAD FILE:
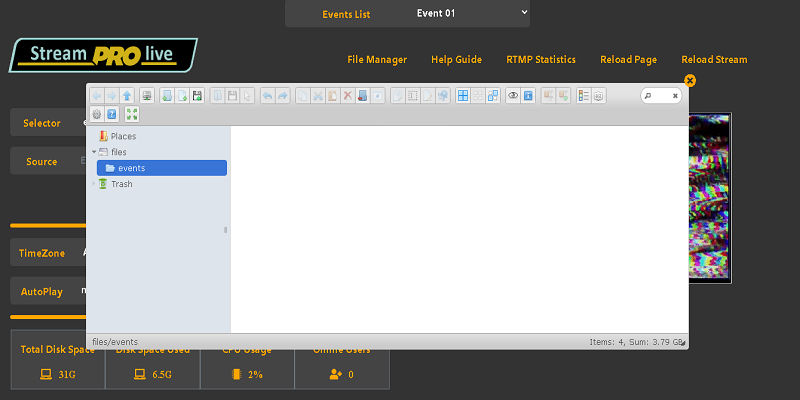
a) Click File Manager:
b) Make sure your event is ALREADY RECORDED AS FLV OR MP4 FILE WITH H264 VIDEO AND AAC AUDIO ENCODING.
c) Click events folder.
d) Right Click on WHITE AREA and Click on UPLOAD FILES.
e) DRAG or Click SELECT FILES button.
f) Allow the upload process to finish and your file will be displayed as an icon in file manager.
g) IMPORTANT: Make sure your filename DOES NOT INCLUDE BLANK SPACES OR SPECIAL CHARACTERS.
h) Close FILE MANAGER Click orange (X) on top right corner.
2- CONTROL PANEL SELECT FILE FOR EVENT
a) On Selector make sure events is selected.
b) On Selector Click -> Select. On the events list files will be displayed by clicking on it. Click on the desired one.
c) On Selector Click -> Apply to fill Source - Event File Source.
d) If selection is correct Click Source -> Set.
3- MANUALLY START EVENT
a) On Stream Controls Click -> Start
4- DATE TIME PROGRAM EVENT START
a) Make sure TimeZone is properly Set. Otherwise this option will not work.
b) Click on AutoPlay as shown next and select DATE and TIME of event.
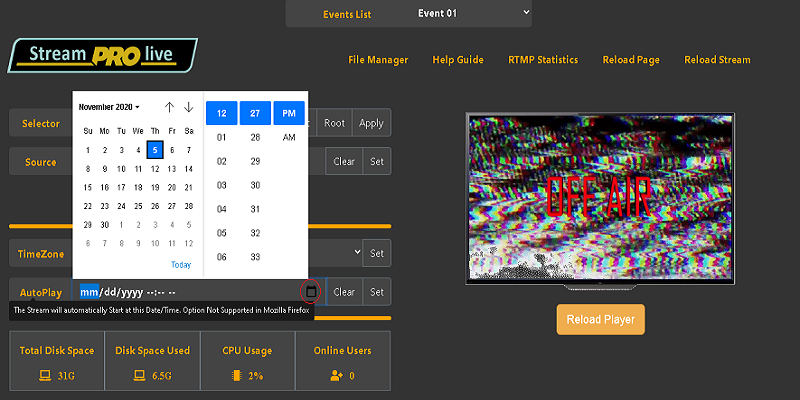
c) DATE and TIME will be displayed instead of mm/dd/yyyy --:-- --.
d) If correct Click AutoPlay -> Set.
e) Menu -> ReloadStream -> ReloadPage.
CONGRATULATIONS!! YOUR RECORDED EVENT WILL START AT THAT DATE/TIME SETTING.
